Look below the ground
The leaves show you what’s happened. The roots and the soil around them show you why. A spade, a sheet of plastic and a glass of water tell you more about a paddock than most tests, and they cost nothing but half an hour.
Dig where the crop is good and where it’s poor, and compare the two. Dig the same spots at each critical stage, and take a photo of each block, so you can see it change through the season and from year to year.
Dig, don’t pull
Pulling a plant strips off its fine roots, its nodules and the soil that clings to them, which is most of what you came to see. Dig instead:
- Push the spade in a hand’s width out from the plant, all the way round, and a full spade deep.
- Lift the whole block out, plant and all, and lay it on a sheet.
- Look at it as it is first: the soil, its crumb, its layers and its smell. The spade test below says how.
- Then break it open gently with your hands, and follow the roots.
- Last, soak the roots in a bucket of water to wash the soil off, and look at them clean.
The roots
Healthy roots are many, fine and branching, all through the block, with clean white tips. Soil clings to them, held by the root hairs and the sugar the root pays out to the life around it. The Soil health page has the picture.
-
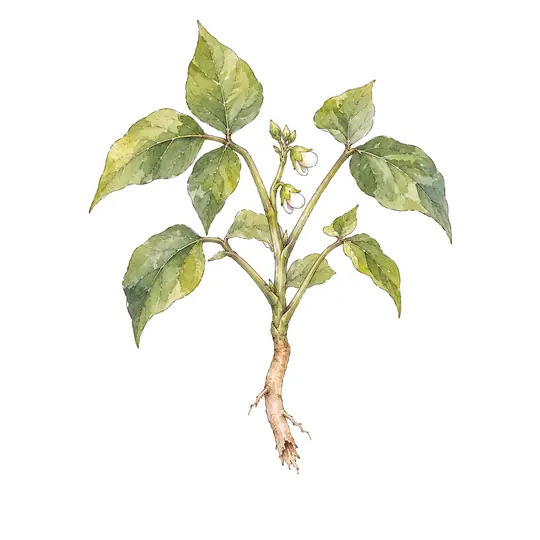
Pulled
a bean, pulled up
most of what you came to see stays in the ground
-
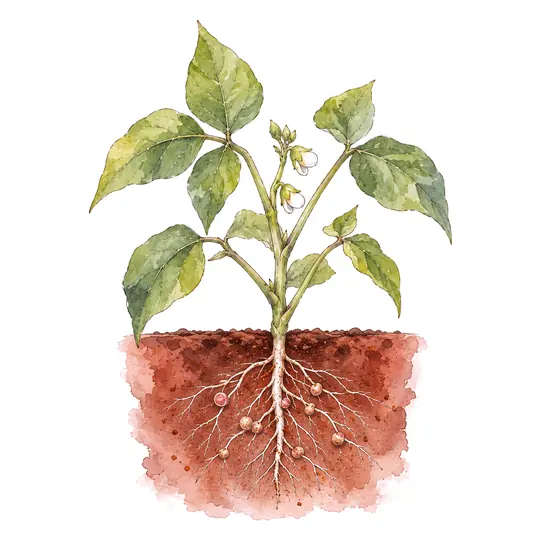
Dug
the same bean, dug a spade deep
the fine roots, the nodules and the soil that clings to them, all there to read


Look out for:
- Roots that turn sideways at the same depth, or run flat along a layer. They’ve hit a hard pan and can’t get down.
- Few roots, with brown tips, and soil that falls away as you lift them. The roots aren’t working, and the life around them isn’t either.
- Dark, soft or slimy roots, whose skin slides off when you pull it. That’s rot, usually where the soil sits wet without air.
- Knots and swellings that are part of the root, and won’t rub off. They can be galls made by nematodes, which a lab can confirm.
- Short, stubby roots, thickened at the tips. Calcium and boron build the tips, and a root short of either stops lengthening. See calcium and boron. In an acid soil, aluminium stunts and swells the tips too: see lime and gypsum.
The nodules
On a legume, such as beans, peas, clover or lucerne, look for the nodules: lumps on the side of the roots. On a bean they’re round. On peas, clover and lucerne they’re longer, and sometimes forked. They rub off easily, unlike a gall. Bacteria live inside them, and take nitrogen from the air for the plant.
- Cut a few open around flowering, once the plants are well grown. Young nodules are white inside until they start working. Pink to red inside means they’re working. White, grey or green inside, on a well-grown plant, means they’re not. Late in seed fill, nodules age and turn green, and that’s normal. See molybdenum, iron and cobalt for what they need.
- Look where they are. Nodules bunched near the top of the main root usually came from the inoculant put on the seed. Nodules spread along the side roots came from bacteria already in the soil.
- Count them, on a few plants from each patch. A legume with few nodules, or none, has to find its nitrogen in the soil like any other crop.
-
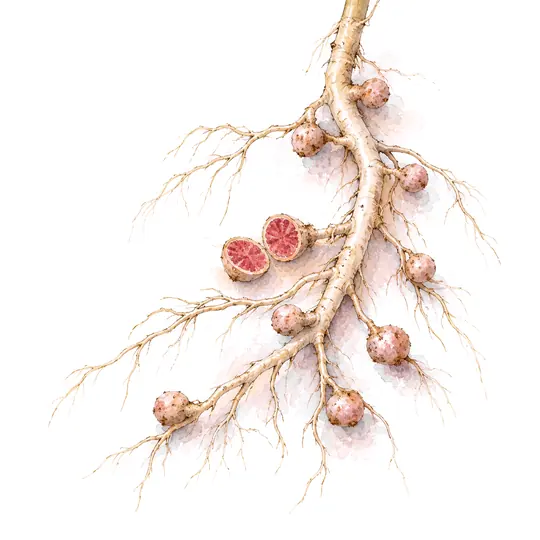
Working
nodules on a bean’s root, one cut open
pink to red inside: they’re fixing nitrogen for the plant
-
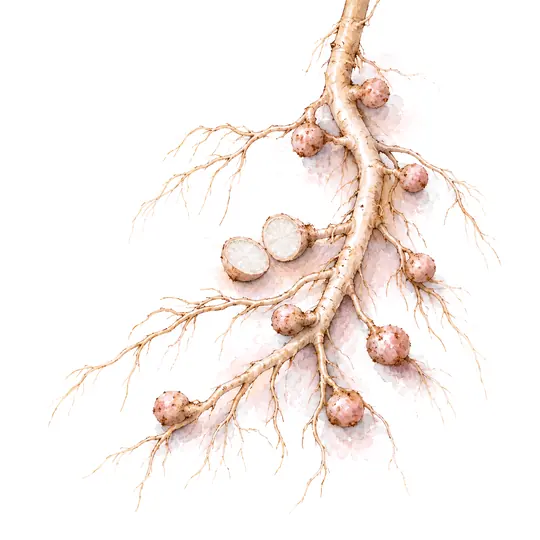
Not working
the same, on a well-grown plant
white, grey or green inside: they’re not
-
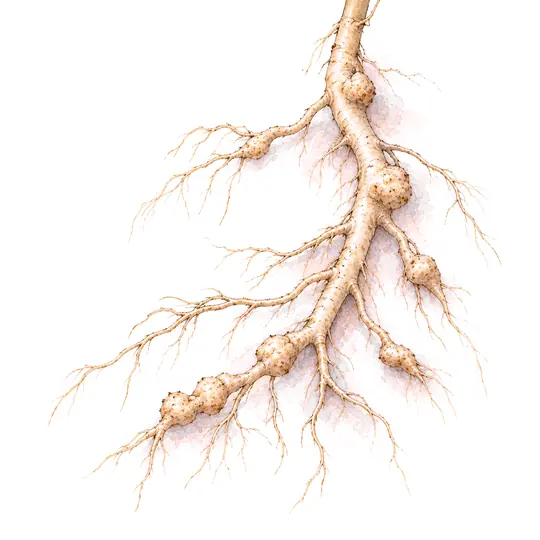
A gall
a knot in the root itself
it won’t rub off: it can be nematodes, which a lab can confirm


The spade test
Before you break the block up, read the soil itself:
- Its crumb. Drop the block onto the sheet from about waist height. A good soil breaks into rounded crumbs of every size, with fine roots running through them. A poor one stays in big, hard clods with sharp edges, or breaks into flat plates.
- Its layers. A layer the spade had to push through, plates lying flat, or roots turning at one depth: that’s a pan, where the soil has been pressed hard.
- Its colour. It should be darker at the top, where the organic matter is, and fade further down. Grey patches, or grey with orange flecks, mean the soil sits wet for long spells without air.
- Its smell. A sweet, earthy smell, like rain on dry ground, comes from the soil’s life. A sour or rotten-egg smell means the soil has been waterlogged, and the life that needs air has gone.
- Its worms. Count them, and look for their holes and the little heaps of soil they leave behind. More is better. Compare paddocks, and the same paddock from year to year.
- Its life. Fine white threads through the soil, or on old roots and stalks, are often a fungus’s. Fine roots look alike, but they’re firmer.
A fungus’s threads. Roots can’t get down.
-
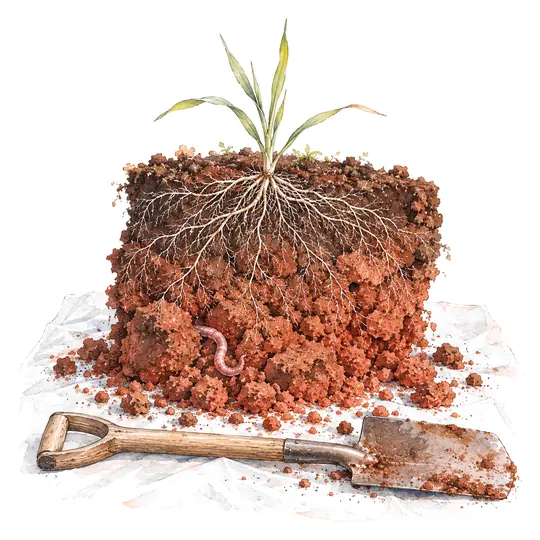
A good patch
a spade-deep block, dropped on a sheet
rounded crumbs of every size, roots all through it, and worms
-
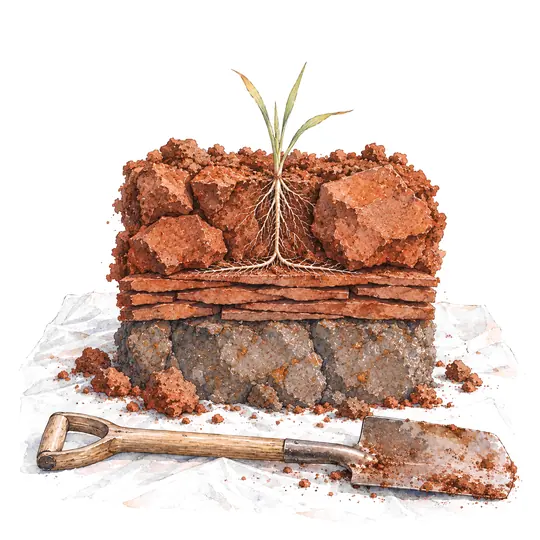
A poor patch
the same paddock
hard clods and flat plates: the roots turn sideways at the pan, and it’s grey where it sits wet


The slake test
The slake test shows how well a soil holds together when it gets wet: whether it will stay open in a downpour, or slump and seal over.
- Take a few dry crumbs, each about the size of a fingertip, from the paddock. Take a few more from a fence line or a patch that’s never been worked, to compare.
- Let them dry right out on a bench for a day or two.
- Sit each lot on a piece of wire mesh, and lower it gently into a glass of rainwater. Salty water can hide a cloud.
- Watch for five minutes. Then leave the glass, and look again after two hours and the next day.
- The crumbs hold their shape, and the water stays clear. They’re held together by the soil’s glue: the sticky stuff its life makes, the fungi’s threads, fine roots, and calcium on the clay. That soil stays open, and the rain soaks in.
- The crumbs slump into a heap, and the water clouds. The glue is weak. That soil will seal over in heavy rain and set hard as it dries.
- A milky cloud spreads out from the crumb, and hangs in the water for hours. The clay itself is coming apart. That’s usually sodium on the clay, though a lot of magnesium can do it too. Have the soil tested before you buy gypsum.
Sodium.
-
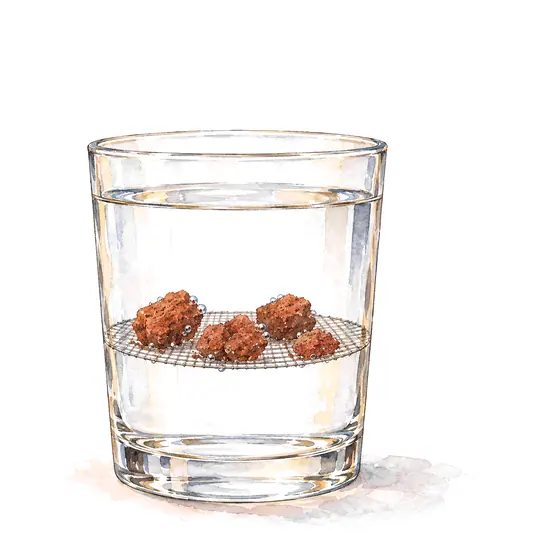
They hold
dry crumbs, five minutes in water
held by the soil’s glue: the life’s sticky stuff, the fungi’s threads and fine roots
-
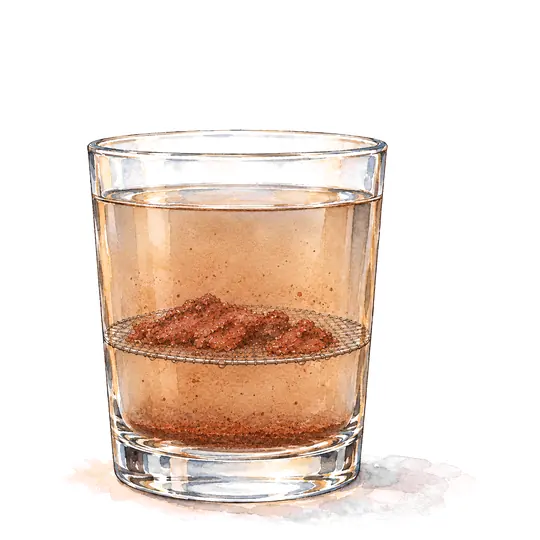
They slump
crumbs from a worn soil
the glue is weak: this soil will seal over in heavy rain
-
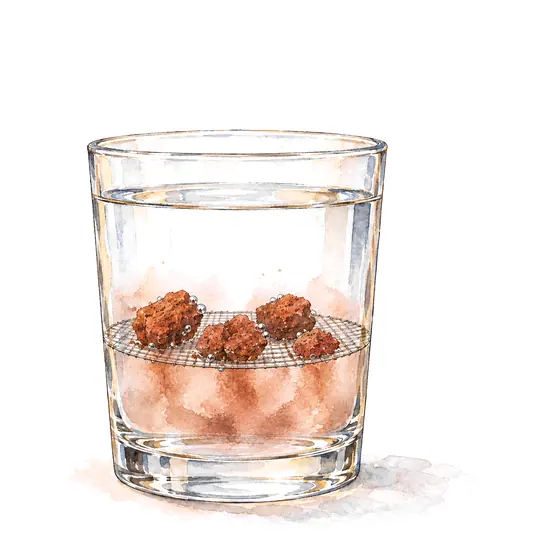
A milky cloud
crumbs from a sodic soil
the clay itself comes apart: most often, sodium


A soil’s crumb comes back as its life comes back. Living roots, the sugar they pay out, and the fungi they feed build it, season on season. That’s why the slake test is one to repeat each year. See changing over.
Where it fits in a program
- Dig before planting, at the crop’s critical stages, and after harvest, in the same good and poor spots each time.
- Take a photo of each block, roots washed and soil whole, and keep it with the date and the stage.
- When a patch is struggling, dig it before you spray it. The answer is often below the ground.
- Run a slake test each year, on the same paddocks.